At a certain point, there comes a day when you realise that you are stiff. Or that perhaps after years of walking, standing or sitting badly, you have shaped your body away from its natural and most supportive structure.
Going to a specialist is highly recommended. A specialist can tell you exactly where your problems are coming from. It may take them a few sessions to understand the problem(s), but it is worth finding out what you should be doing to realign your body and strengthen your muscles and joints.
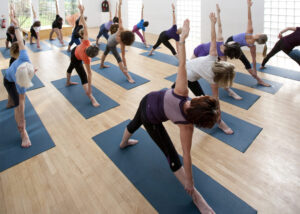
Most specialists recommend stretches and yoga. Because they know what your problem is, they can advise you on which stretches or poses to do and which to avoid. At the beginning of class, trainers ask their students if there is any injury or medical issue that they should be aware of. Let them know what the specialist told you so that you can focus on key areas to work on and reduce the risk of further discomfort.
Top 7 Restorative Yoga Poses To Practice At Home
Restorative yoga typically involves just a handful of poses and a range of props to help support your body, easing you into complete relaxation. Restorative yoga poses include light twists, small heart and hip openers, and gentle backbends. Through the use of props that allow you to hold poses longer, giving you all the benefits of deep, passive stretching. Poses must be held for at least a few minutes, and you can stay in place for up to 15 minutes using bolsters, pillows, straps, blocks, etc. to support your body in a full, long, and comfortable stretch.
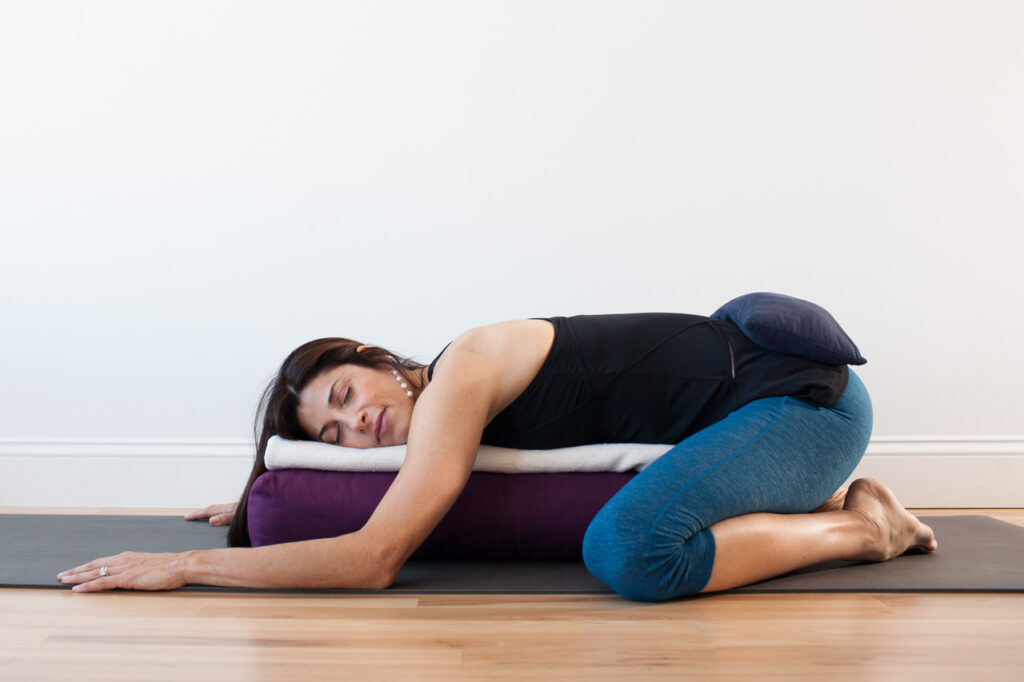
Supported Child Pose
The first pose is an elaboration of a classic. Kneel, separate your knees almost as wide as your mat, bring your big toes together, and place the pillow lengthways between your knees. If you’d like, let your arms rest by your sides or reach them forward. If you’re reaching your arms forward, allow your forearms to relax on the mat. Breathe here, turning your head about halfway through.
This pose is a total reset for your entire body, much like a reset button. DUring your breathing exercises, you can release any negative energy, and welcome in the positive.
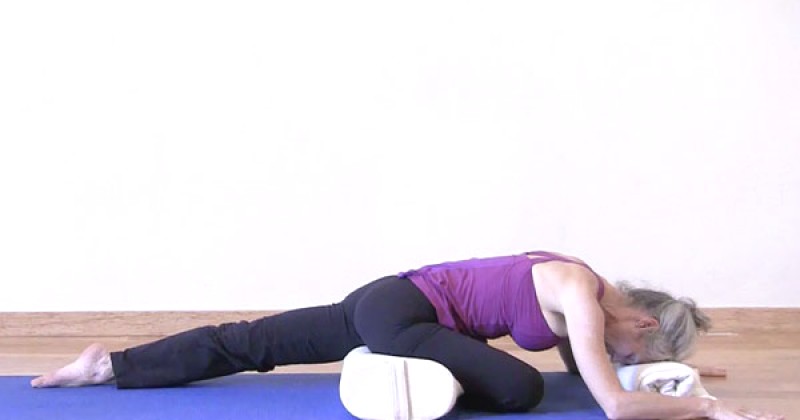
Supported Downward Facing Fallen Tree Pose
When coming down to a tree pose towards your belly, place a pillow under your right knee to elevate it. Lower down to rest your forehead on another pillow, a blanket, your arms or the mat. Stay for at least two minutes before switching sides.
Supported Bound Angle Pose
Sit tall and bring the soles of your feet together, coming into butterfly pose. If your hips are tight and you’d like knee support, place a pillow, yoga block or blankets under each knee. Gently fold your upper body forward and relax into the posture.
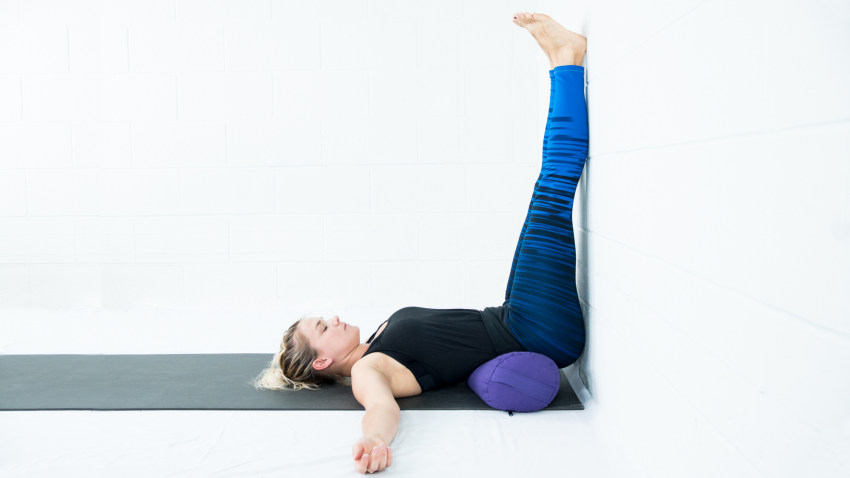
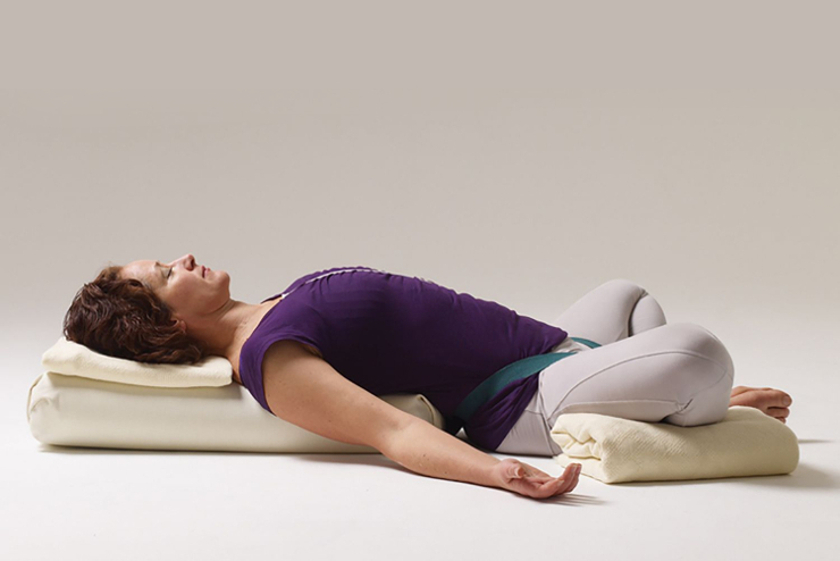
Supported Legs Up the Wall Pose
Begin sitting sideways so you can scoot your hips close to the wall. Once you feel connected to the wall, roll onto your back, place both feet on the wall for support, and lift your pelvis off the floor so you can set your bolster underneath your mid to lower back towards the top part of the pelvis.
Keep in mind, the bolster will keep your hips elevated from the floor. Extend your arms wide, keeping your palms up to maximize your heart opening stretch.
Supported Supine Twist
Supine twist is a wonderful posture to help restore the body and the mind. It is a gentle stretch in the lower back, gentle being the key word here. Place a blanket over a yoga mat and lie down, with another folded blanket to the right of your head and a bolster or cushion to the left of your hip. Lay your right arm on the blanket near your head, then twist your spine and place right leg on the bolster or cushion to the left, stacking your hips. Rest left hand on outer thigh. Hold for 3 minutes, then switch sides and repeat.
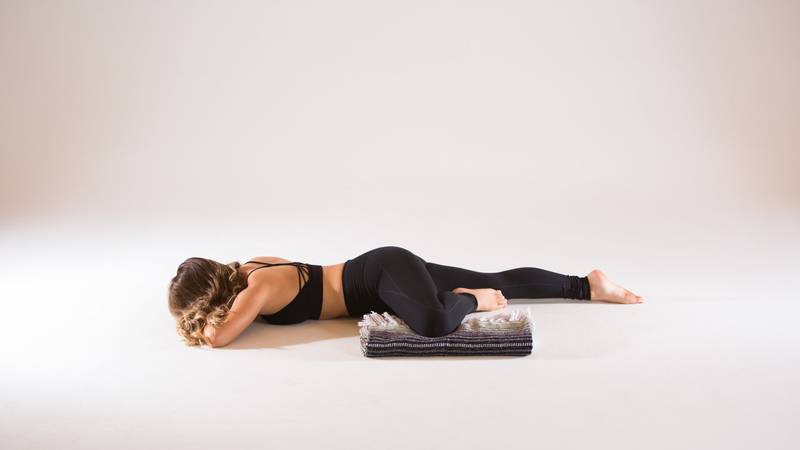
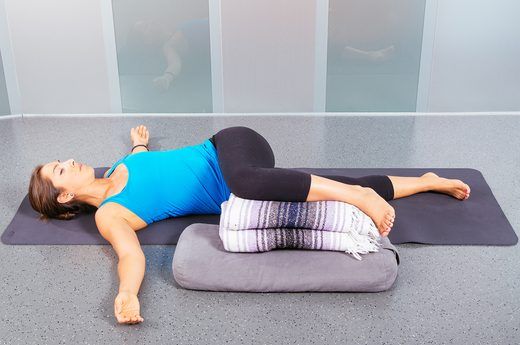
Supported Pigeon Pose
Place one block or cushion at the top of a yoga mat, one at the center of the mat, and a bolster or folded blanket lengthwise farther down. Lie down with head resting on the top block or cushion, ribs resting on the other, left leg bent with foot under right hip, and right leg extended, resting on the bolster or folded blanket. Rest forearms to the sides of head. Hold pose for 3 to 5 minutes, then switch sides and repeat.
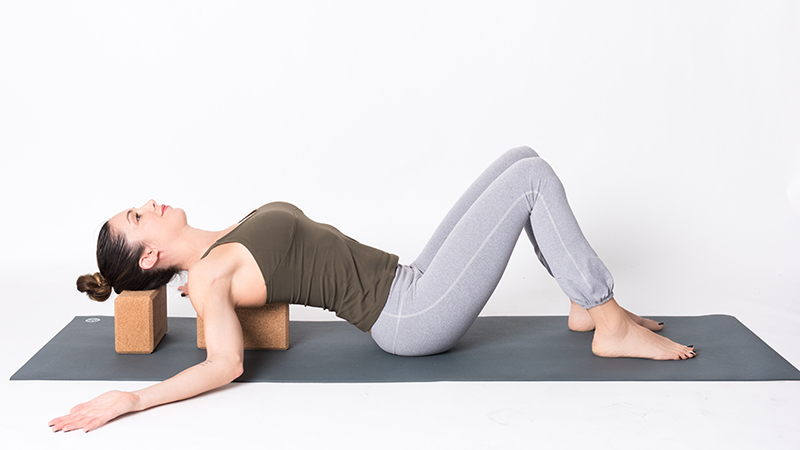
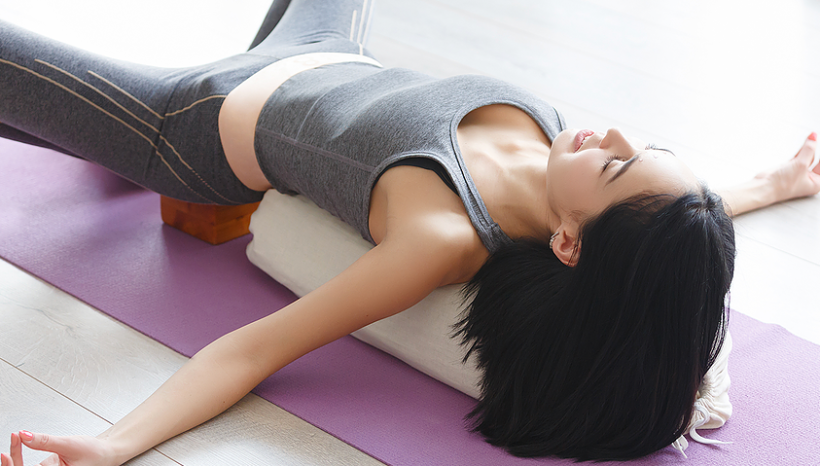
Supported Backbend
Place one block or cushion at the top of a yoga mat and another block or cushion about a foot and a half farther down. Lie down on your back with one block or cushion under head and the other under shoulder blades. Lay arms out to the sides and lengthen legs. Hold for 5 to 8 minutes.


