Supported Backbend

Contents
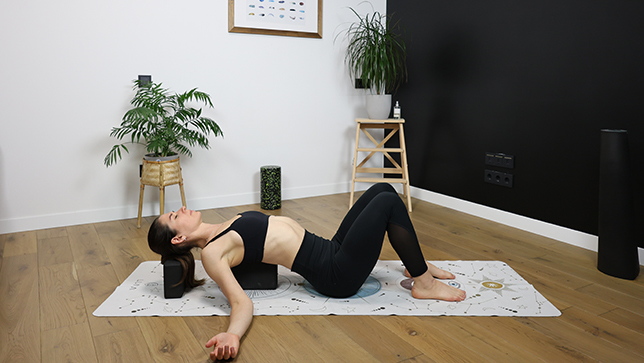
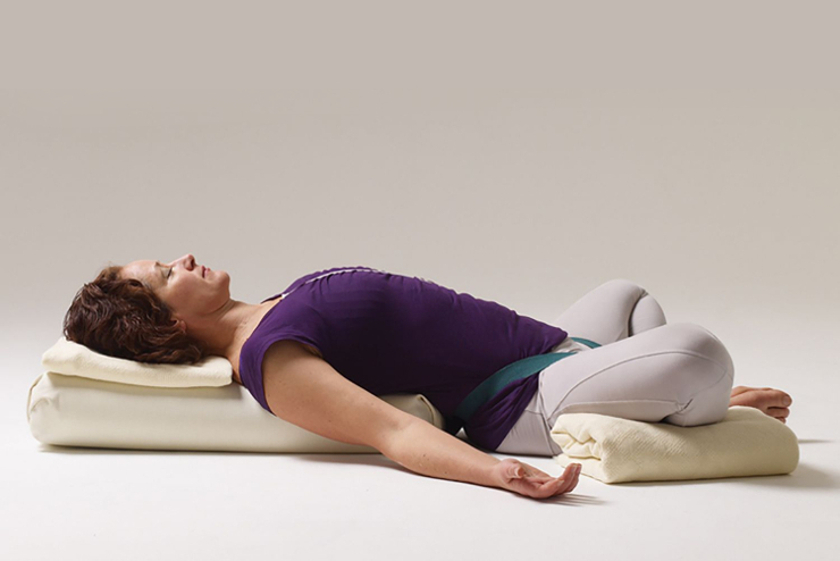
The Supported Backbend is a passive backbend that provides a gentle, supported chest opening while promoting relaxation.
Backbends are a great way to counteract the rounding of our shoulders that tends to happen daily when we are sitting at a desk on the computer, using any mobile device, or driving a car. Many people habitually carry tension in the shoulders and may suffer from tension headaches from doing so. This pose will help open up that area and encourage breathing as we tend to hold it when we are carrying tension. The Supported Backbend adds energy to the body and can leave you feeling refreshed. You will feel a gentle stretch in your upper chest and shoulder area.
Pose Detail
- Body Position: Backbend Yoga Poses, Supine Yoga Poses
- Difficulty: Beginners
- By Type: Chest Opening Yoga Poses, Flexibility Yoga Poses, Restorative Yoga Poses, Shoulder Opening Yoga Poses
- By Benefit: Yoga Poses For Digestion, Yoga Poses For Neck Pain, Yoga Poses For Stress Relief
Step-by-Step Instructions
Benefits and Contraindications
Improves flexibility and focus
Stretching of the muscles and fascia of the front part of the body
Opens the lungs and chest
Reduces stress and tension
Regulates blood pressure
Disc disease
Pain in your lower back
Pregnancy for more than three months
Menstruation
Photo poses in different angles

Modifications and Props
For performing this pose put a bolster, a folded blanket, or a pillow under your back. Find which height is comfortable for your back to hold for a period of time. Use a rolled up blanket under your neck for more support and as a way to allow the throat to open.
If you feel any pain or discomfort, come out of the pose and try another prop at a lower height.
Useful Tips
Honor and work within your limits related to flexibility, strength, and range of motion. Be aware that yoga poses, especially backbends, may cause you to feel a range of emotions. Understand that this is normal and allow yourself to experience the feelings that arise.
- Focus on lengthening your spine and opening your chest. To prevent compressing into your lower back, elongate your spine as you imagine a line of energy running along your spine and out through the crown of your head.
- Activate your arm muscles to lift and open your chest.
- Experiment with leg positions such as Half Lotus Pose (Ardha Padmasana) or Butterfly Pose (Baddha Konasana).
- If it’s not comfortable to tilt your head back, keep your neck in a neutral position or use cushions and blocks for support.
- Use cushions and blocks to support your spine, chest, or shoulders.
Frequently Asked Questions
The frequency of your supported backbend pose practice will depend on your individual needs and goals, as well as your level of experience and comfort with the pose. As with any yoga pose or practice, it’s important to listen to your body and give yourself enough time to rest and recover between sessions. Here are some general guidelines:
- If you’re new to supported backbend pose or yoga in general, start with one session per week and gradually increase as you become more comfortable and confident.
- If you have a regular yoga practice, you can incorporate supported backbend pose into your routine 2-3 times per week, or as often as feels good for your body.
- If you’re using supported backbend pose therapeutically to address specific issues, such as back pain or stress relief, you may benefit from practicing it more frequently, under the guidance of a qualified yoga teacher or therapist.
Ultimately, the key is to listen to your body and practice in a way that feels safe and sustainable for you. If you experience any pain or discomfort during or after the pose, dial back or take a break as needed.
Yes, supported backbend pose can help improve posture by stretching and strengthening key muscles that support the spine, such as the back muscles, abdominals, and chest muscles.
Variations
- Reclining Hero Pose
- Supported Supta Baddha Konasana
- Supported Fish Pose:
- Supported Bridge Pose
- Supported Backbend With Head Support