One-legged King Pigeon Pose A - Eka Pada Rajakapotasana

One-legged King Pigeon Pose A - YanvaYoga

Contents

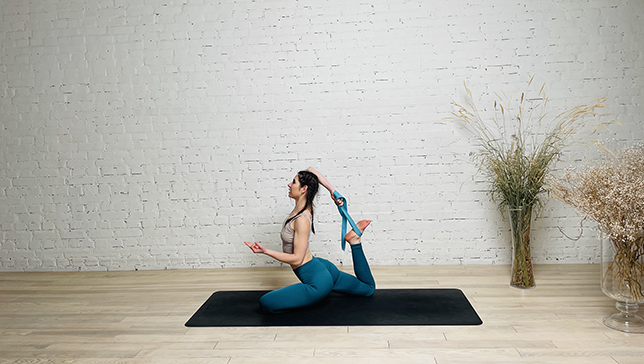
One-Legged King Pigeon Pose or Eka Pada Rajakapotasana (eka “one” + pada “foot or leg” + raja “king” + kapota “pigeon” + asana “pose”) is a beautiful and deep backbending posture. This challenging pose requires a great deal of anatomical intelligence, flexibility, and core strength to safely reach its fullest expression.

This is certainly not a posture that can be attained through just one practice, so creating a sequence around this pose does not necessarily guarantee it will immediately be achievable. And that is okay. Practice anyway. Continue to practice and, overtime, you will find this asana becoming more and more attainable.

Step-by-Step Instructions

Step 1
Begin in Pigeon Prep Pose, positioning one leg in front of you with the shin resting on your mat, while the other leg extends straight behind you. Your front shin can either be parallel to the top of your mat or brought closer to your body for comfort.
Step 2
Align your hips to face forward and engage your inner thighs by squeezing them together.
Step 3
Press your front-leg shin firmly into the mat, establishing a solid foundation.
Step 4
Rotate your body towards your back leg and extend your same-side hand behind you, reaching for your foot and gently pulling it towards your body.
Step 5
Reach around with your hand to stabilize your foot, while the same-side arm of your back leg wraps around the outside of your back leg, creating a flipped grip.
Step 6
Turn your hand inward, gripping the pinky-toe-edge of your back-leg foot.
Step 7
Ensure that your elbow is pointing downwards, then rotate your torso towards the front of the mat.
Step 8
Elevate your elbow upward and overhead. If you have a stable balance, raise your other arm, bend it at the elbow, and grasp your foot.
Step 9
Elevate your abdomen and chest, extend your back leg by kicking it backward, and direct your gaze upwards to complete the pose.

Benefits and Contraindications

Benefits

Opens the chest and lungs

Deeply stretches the hips

Stretches the abdominal organs

Contraindications

Sacroiliac injury

Ankle injury

Knee injury

Dislocated shoulder

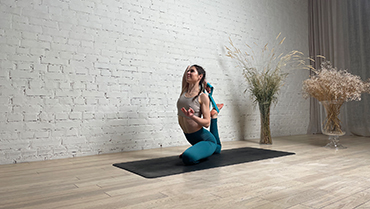
Photo poses in different angles

Modifications, Props ana Tips

If you cannot lower the hip of the front leg to the floor, support it with a folded blanket or a block.
The position of your front foot will depend on your anatomy and flexibility. You can keep the shin parallel to the hips, or move the ankle close to your groin. Both versions are correct – as long as you feel no pain.
This pose is both a deep back bend and a deep hip-opener. For this reason, never perform it without a proper warm-up. It would be best to do it towards the end of your practice.
Keep the toes of your front leg flexed to protect the knee.

Frequently Asked Questions

Variations

  • One-Legged King Pigeon Pose B
  • Seated Pigeon Pose
  • Reclining Pigeon Pose

Top Preparatory Pose


Iana Varshavska
Iana Varshavska
Website administrator

A digital marketer in love with yoga and everything that goes along with it. In 2021, her huge passion for yoga led her to yoga teacher trainings. After successfully completing her studies, Iana received her Yoga Alliance U.S. certification, left the corporate IT world and devoted herself to the development of Yanva. To be able to create the best online yoga space for yoga enthusiasts like her, Iana is constantly learning and improving her skills in various aspects of yoga philosophy, anatomy and biomechanics. Since 2021, she has continued to attend various types of teacher training, including yoga therapy, gives online and offline classes, and conducts local workshops for people who want to learn more about yoga. At the moment, Iana continues to work on her personal practice, improving her hand balancing skills, as well as developing her own training programs.