Garland Pose - Malasana
Contents
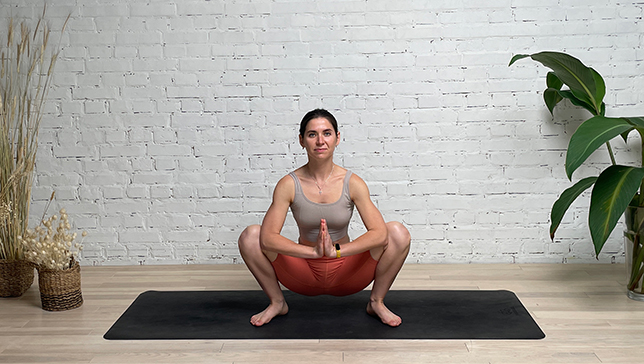
Garland Pose or Malasana is a very basic pose and should come naturally to all. But with modern comfort and habits, the simple bending of the knee and sitting on our feet has become a great challenge to most of us. Malasana brings back the most simple way of using the lower back and the knees to squat on the floor which otherwise should come naturally.
Garland Pose works wonders on the digestive organs and this is done by the simple method of sending apana (one of the five vital Vayus as per Yoga) downwards and thus bringing a strong Muladhara (one of the Chakras in the human body as per Yoga Sutras), which is the root of the spine.
Garland Pose is considered a base pose as garland pose variations can be derived from this pose. Garland Pose helps boost energy in the body and hence can be included in flow yoga sequences.
Pose Detail
- By Type: Balancing Yoga Poses, Flexibility Yoga Poses, Hip Opening Yoga Poses, Pregnancy Yoga Poses, Strengthening Yoga Poses
- Difficulty: Beginners
- Body Position: Seated Yoga Poses
Step-by-Step Instructions
Benefits and Contraindications
Increases flexibility of hips
Stretches groins
Strengthens and tones pelvic floor
Strengthens thighs, knees, shoulders, arm and neck
Strengthens digestive system Improves circulation and energy
Massages internal organs
Lengthens spine and tones spinal nerves
Sciatica
Knee problems
Photo poses in different angles

Modifications and Props
Like many yoga poses, the garland pose can be modified.
- Place a folded blanket under your heels for support if it’s difficult to keep them on the ground.
- You can also sit on a couple of blocks if it’s hard to squat.
- For balance, touch your fingertips to your yoga mat or hold the back of a chair.
- If you experience knee pain try using a prop to support the insides of your knees. Roll a blanket, towel, or sticky mat and place it in the crease of both knees. As you lower into the pose, make sure the prop stays behind your knees. If your knees still hurt, try practicing with your lower back resting against a wall. Don’t stay in the pose if your knees continue to hurt, even with the prop or wall.
- If you are stiff in the groins and have trouble bending forward try sitting on a low bench or crate. Make sure it’s stable, bring the chest close to the thighs, then open the knees and extend the chest farther down. This will help you to relax your groins. You can modify the height accordingly for your leg length. Do not sit higher than you need to, but explore your limits. The idea is to remove tension from the groins.
Women who are pregnant and those who need help balancing have a few options:
- Rest both hands on the back of a chair.
- Rest one hand along a wall to the side of the body.
- Do the pose with your back against a wall.
Experienced students may step their feet completely together or drape the torso between the legs:
- Reach both arms forward, then bend the elbows and bring the shins into the armpits.
- Extend the arms behind your body and clasp the heels.
- Drop the forehead to the mat.
Technical Tips
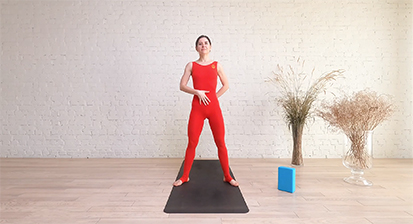
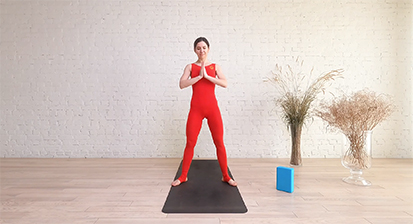
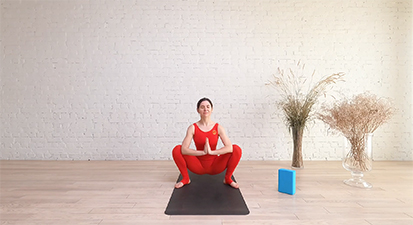
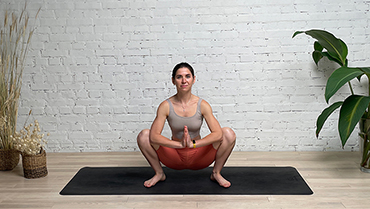
Root and ground foot soles into floor. Turn the feet slightly outward. Lift pelvic floor and lower belly. Bend knees and lower the tail towards the ground. When squatting, lean back into the heels. Tuck the chin, bringing tail and head into one line. Use the elbows to open the knees wider and lift upwards from head crown to lengthen the spine and open the chest.
When lifting up from the pelvic floor, imagine the lower belly to be a round bowl of jelly. Cradle the bowl with pelvic and abdominal muscles. To add length to neck, imagine sliding the ears back.
Practicing Garland Pose can be a great way to challenge your balance and loosen tight hips. It might be difficult at first, but with practice, your muscles will lengthen and you will be able to squat. Keep the following in mind when practicing this pose:
- Avoid jerking, pulling, pushing, or forcing any movement in this pose. Let your movements be slow and smooth.
- Do not bounce your hips up and down. Doing so can overstrain your knees and hip flexors.
- Keep shifting your weight back into your heels.
- Lengthen the front of your torso and keep your spine long, not rounded.
Frequently Asked Questions
Modifications & Variations
- Garland Pose With Partner
- Garland Pose Hands On Chair
- Garland Pose Hands On Heels
- Garland Pose Hands Forward
- Garland Pose with a blanket under your heels
- Garland Pose sitting on a block
- Garland Pose against a wall
Top Preparatory Poses
- Mountain Pose
- Swaying Palm Tree Pose
- Chair Pose
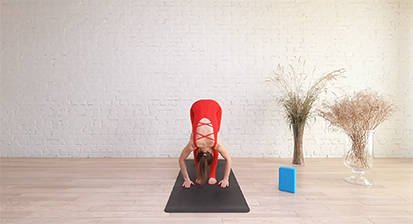
- Standing Forward Bend Pose
- Tree Pose
- Downward Facing Dog Pose
Top Follow-Up Poses
- Revolved Garland Pose
- Four Limbed Staff Pose
- Cobra Pose
- Downward Facing Dog Pose