Half Bound Lotus Standing Forward Bend - Ardha Baddha Padmottanasana
Contents
Half Bound Lotus Standing Forward Bend or Ardha Baddha Padmottanasana (ARD-uh BAHD-uh PAHD-mo-tun-AHS-uh-nuh), is a classic combination of half lotus pose (ardha padmottanasana) and standing forward bend pose (uttanasana). The name comes from the Sanskrit ardha, meaning “half,” baddha, meaning “bound,” padma, meaning “lotus,” uttana, meaning “intense stretch,” and asana, meaning “pose” or “posture.
The pose involves holding one leg as though in half lotus pose and bending forward while standing instead of sitting, as one would in uttanasana.
Ardha Baddha Padmottanasana improves several other mental capacities as well. Regular practice of the pose boosts concentration levels, elevates the state of mind, and improves the practitioner’s sense of mental and emotional balance.
Pose Detail
- By Type: Balancing Yoga Poses, Flexibility Yoga Poses, Strengthening Yoga Poses
- Body Position: Forward Bend Yoga Poses, Standing Yoga Poses
- Difficulty: Intermediate
- By Benefit: Yoga Poses For Digestion, Yoga Poses For Stress Relief
Step-by-Step Instructions
Benefits and Contraindications
Opens up the chest and shoulder muscles
Improves strenght and body flexibility
Relieves stiffness in hips and knees
Improves balance an posture
Stimulates liver and spleen, massages abdomen and improves the digestion
Calms your mind, reduces stress and anxiety
Recent or chronic knee or hip injury
High or low blood pressure
Lightheaded
Headaches
Glaucoma
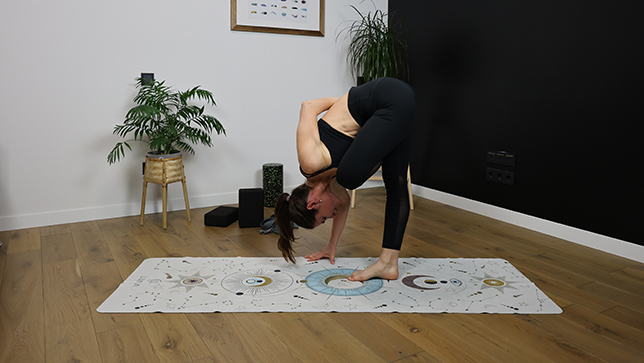
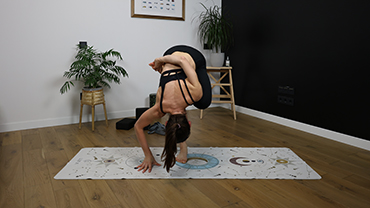
Photo poses in different angles

Modifications and Props for Beginners
- Half Lotus Modification: If you can’t reach your foot to place it on your thigh, you can modify the pose by placing your foot on the floor next to your standing leg.
- Use a Strap: If you can’t reach your foot with your hand, you can use a strap. Loop the strap around your foot and hold onto the ends to help guide your foot into position.
- Use a Block: Place a yoga block on the floor in front of you and rest your hand on it as you fold forward. This will help you maintain a flat back and prevent rounding in your spine.
- Bent Knee Modification: If you have knee pain, you can modify the pose by keeping your standing leg slightly bent or by placing a folded blanket under your knee.
Useful Tips
- Take your time. As with any balancing pose, it’s often easier to come into the pose slowly and with awareness. If you enter the pose too quickly, you are more likely to lose your balance, and it’s more difficult to re-gain your balance once it’s been lost.
- Work to get the knees aligned when you are upright. If the knee of your bent leg is in line with the knee of your standing leg, it will be easier to fold forward.
- Keep your neck relaxed.
- Keep your shoulders parallel to the floor.
- Keep your standing leg straight, not bent.
- Keep your ego in check.
Frequently Asked Questions
It is important to approach any pose mindfully and with awareness of your body’s limitations. If you have knee or hip injuries or limitations, you can modify the pose by keeping the legs straight or using props such as blocks to support your hands.
Hold Ardha Baddha Padmottanasana for 5-10 breaths on each side, gradually increasing the duration as your practice develops.
Common mistakes to avoid in Ardha Baddha Padmottanasana include rounding the spine, collapsing the chest, and forcing the foot into the hip crease. It is important to keep the spine long and the chest lifted, and to approach the pose with patience and awareness of your body’s limitations.
It is best to consult with a qualified yoga teacher or healthcare professional before practicing Ardha Baddha Padmottanasana during pregnancy. Modifications can be made to make the pose more suitable for pregnancy, such as using a block for support or avoiding the half lotus position.
Variations
- Standing Forward Bend Pose
- Half Lotus Tree Pose
- Standing Wide Legged Forward Fold Pose
- One-legged King Pigeon Pose A
- Bound Half Lotus Forward Fold
