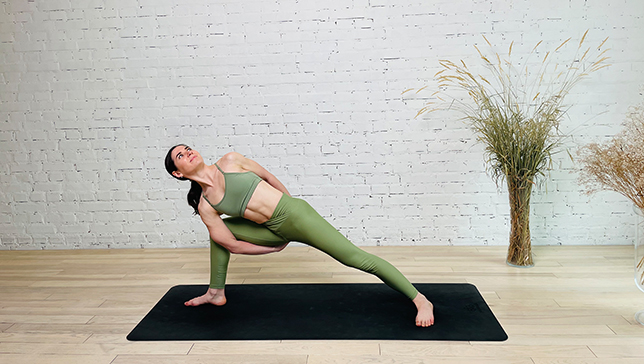
Bound Extended Side Angle Pose - Baddha Utthita Parsvakonasana
Contents
Bound Extended Side Angle or Baddha Utthita Parsvakonasana (BAHD-uh oo-TEE-tah PARZH-vuh-ko-NAHS-uh-nuh) is a standing yoga pose that combines the benefits of two different postures: the Extended Side Angle Pose (Utthita Parsvakonasana) and the Bound Angle Pose (Baddha Konasana).
Baddha Utthita Parsvakonasana stretches the lower back and strengthens the legs and the core. This pose is often used in the Warrior series in yoga and is part of a chain of standing poses designed to strengthen the lower body while stretching the hips and opening the upper body.
Overall, the Bound Extended Side Angle Pose is a powerful and dynamic posture that can help you build strength and flexibility while also calming the mind and connecting with your breath.
Pose Detail
- By Type: Balancing Yoga Poses, Chest Opening Yoga Poses, Flexibility Yoga Poses, Shoulder Opening Yoga Poses, Strengthening Yoga Poses
- Difficulty: Intermediate
- Body Position: Lateral Bend Yoga Poses, Standing Yoga Poses
Step-by-Step Instructions
Benefits and Contraindications
Stretches the lower back and strengthens the legs and the core
Opens the shoulders
Promotes stability in the front and back of the torso
Calming the mind
Tones the lower body
Insomnia
Neck injury
High or low blood pressure
Headaches
Shoulder injury
Photo poses in different angles

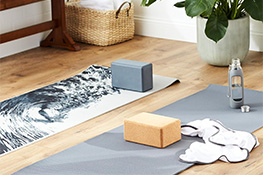
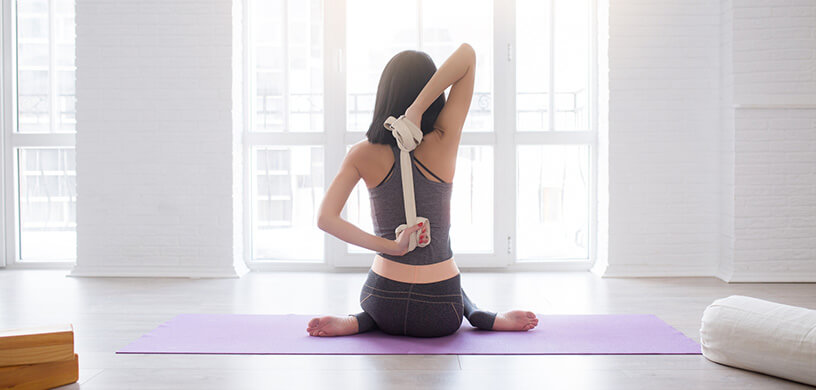
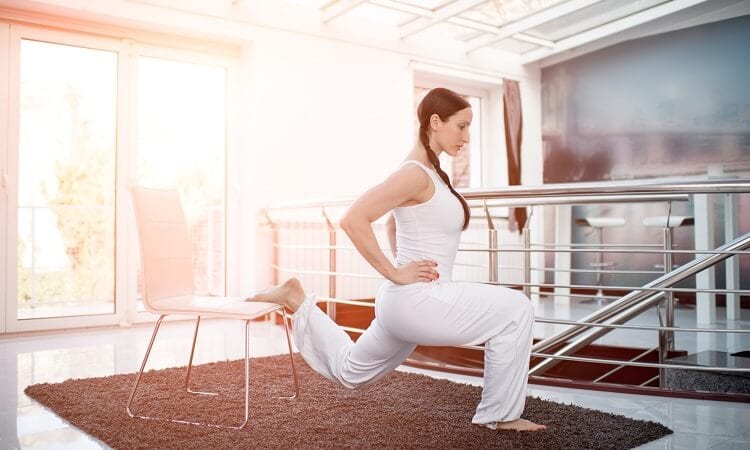
Modifications and Props for Beginners
- If you are unable to clasp your hands together behind your back, use a strap to hold your hands together. This will help you open your chest and shoulders without straining your arms.
- If you have difficulty with balance, use a wall for support. Stand with your back against the wall and perform the pose.
- If you have knee or hip injuries, you can use a chair for support. Place the chair next to your front foot and rest your hand on the seat of the chair. This will help you maintain proper alignment and avoid strain in the knee and hip.
Useful Tips
- Keep your spine long throughout the pose. Lengthen from the tailbone to the crown of your head.
- Engage your abdomen, drawing your belly in. This will help to stabilize the pose from your core.
- Do not allow your top shoulder to drop forward in the pose. Lift your chest and broaden across your collar bones.
- Keep the outer edge of your back foot pressing firmly into the mat. Try to ensure that your back baby toe is on the mat.
- Keep your front knee aligned with your front ankle. Do not allow the knee to drift inward — this can strain the knee joint. Instead, imagine it slightly moving out toward the baby toe.
Frequently Asked Questions
It depends on the severity of your injury and the advice of your healthcare provider. If you have knee or hip injuries, it may be helpful to use a chair or a block for support, modify the position of your legs, or avoid the pose altogether. Always listen to your body and practice with awareness and intention.
It depends on your individual circumstances and the advice of your healthcare provider. If you are pregnant, it may be helpful to modify the position of your legs, use a block for support, or avoid the pose altogether. Always listen to your body and practice with awareness and intention.
Some common mistakes to avoid in Bound Extended Side Angle Pose include collapsing the front knee or arching the back too much, rounding the spine, collapsing the chest, and straining the neck or shoulders. Always maintain proper alignment and listen to your body to avoid injury.
Top Preparatory Poses
Top Follow-Up Poses
A yoga block crafted from cork material serves as a supportive prop in yoga practice....
You do not compulsorily need anything more than your body, breath, and a room spacious...
If you ask a beginner yogi to make a list of common yoga equipment, nine...

The art of yoga is a special one and those who enjoy practicing on their...
