Tiger Pose - Vyaghrasana

Contents
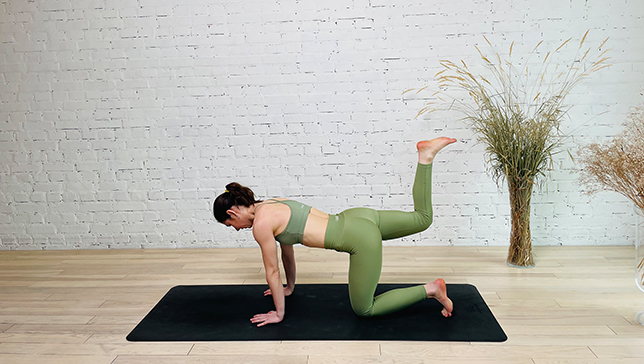
Tiger Pose got its name due to its familiarity with a tiger who is stretching after waking up. In Sanskrit, it’s called Vyaghrasana where Vyaghra means “Tiger” and Asana means “yoga posture”.
Tiger Pose is a fantastic choice if you’re looking for a gentle way to work on your core muscles, balance skills, and flexibility.
This pose is a fantastic choice if you’re looking for a gentle way to work on your core muscles, balance skills, and flexibility. The pose may also serve as a part of your warm-up routine, to prepare your body for more challenging balancing and back-bending asanas.
It can be performed dynamically like Cat and Cow stretch, and you can also hold it for some time. The dynamic variation may be more suitable if you are warming up, while holding for longer may help you work more on your endurance and spinal health.
The backbend allows you to open your chest, which may help release tension and reduce symptoms of mild depression, stress, and anxiety.
It will also strengthen the back and is a good addition to any routine focused on building a better posture and counteracting the effects of prolonged sitting.
Energetically, this pose stimulates the Sacral Chakra, which may boost your creativity and allow you to feel pleasure in life and relationships.
Pose Detail
- Body Position: Arm & Leg Support, Backbend Yoga Poses
- By Type: Balancing Yoga Poses, Chest Opening Yoga Poses, Flexibility Yoga Poses, Hip Opening Yoga Poses, Shoulder Opening Yoga Poses, Strengthening Yoga Poses
- Difficulty: Beginners
- By Benefit: Yoga Poses For Anxiety And Panic Attack, Yoga Poses For Digestion, Yoga Poses For Neck Pain, Yoga Poses For Stress Relief, Yoga Poses For Weight Loss
Step-by-Step Instructions
Benefits and Contraindications
Loosens your leg and hip joints
Stretch abdominal muscles
Improve blood circulation
Promote weight loss
Improve digestive system
Hernia
Pregnancy
Injury or pain in neck and lower back
High blood pressure
Heart disease
Peptic ulcer
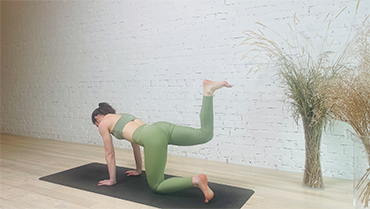
Photo poses in different angles

Modifications, Props and Tips For Beginners
- Placing blankets beneath the knees for added support is a fantastic technique to start learning this position to reduce pressure on the knees.
- Another option is to lay blankets or an additional yoga mat beneath the hands to improve grip and relieve pressure on the shoulders. If you want to put less pressure on your wrists try using your fists. It will challenge your balancing skills and train your core. One also gets confidence in their ability to balance the body comfortably.
- Using a wall to support the bent leg for additional support while still feeling the stretch might be an alternative to doing this position. Bringing yourself near the barrier with your back to it, elevate the leg that is raised and lay the knee on the barrier or the feet on the wall. However, do not overstretch yourself, as you might hurt yourself.
- If you’re unsure of your equilibrium, don’t raise your neck. Continue to look forward until you can confidently balance your body. For some people, looking up might make them feel uneasy and excited. If you have this difficulty, you can avoid looking up.
Useful Tips
While arching back upward, make sure that your thigh touches the chest and your foot does not touch the ground.
Initially, due to a stiffened body, it would be hard for some practitioners to complete the asana in one go; here one should know own body limit and avoid overstraining.
Frequently Asked Questions
Beginners should start by focusing on the alignment of their spine and keeping their core engaged. It is also important to breathe deeply and slowly throughout the pose. If you have any lower back issues, you may want to avoid lifting your leg too high or extending your arm too far forward. You can also use props, such as a yoga block or blanket, to help support your body if needed.
You can hold Tiger Pose or Vyaghrasana for anywhere from 5 to 10 breaths on each side, or for longer if it feels comfortable for you. It’s important to listen to your body and only hold the pose for as long as you feel comfortable.
Yes, if you have any injuries or medical conditions, it’s important to consult with a doctor or a yoga teacher before practicing Tiger Pose or Vyaghrasana. It’s also important to warm up your body properly before attempting this pose, and to avoid overstretching or straining your muscles.
Variations
- One-Handed Tiger Pose
- Balancing Table Pose
- Raised Tiger Pose
- Tiger Pose At The Wall