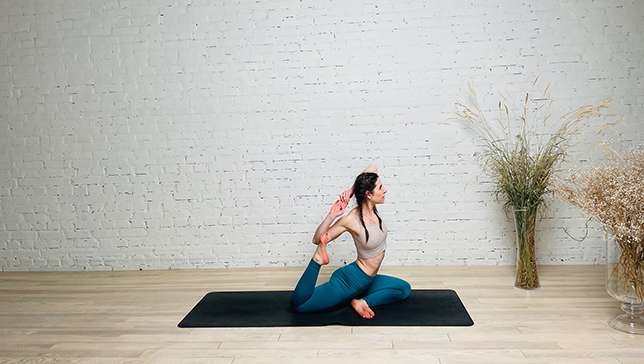
Mermaid Pose - Eka Pada Rajakapotasana

Mermaid Pose - YanvaYoga

Contents

The Mermaid Pose or Eka Pada Rajakapotasana in Sanskrit (Eka means ‘one’, Pada means ‘foot’, Raja means ‘King’, Kapota means ‘pigeon’, and asana means ‘pose’), also known as the Pigeon Pose variation, is an advanced level seated back bending, heart and hip opening yoga pose.

This asana is primarily based on the Pigeon Pose and offers the same advantages. However, it’s more beginner-friendly, as it does not require as much flexibility and strength as the pigeon pose. The mermaid pose targets several body parts at once, including the middle and lower back, hamstrings, ankles, feet, chest, pelvic, quads, hips, and psoas muscles.

Step-by-Step Instructions

Step 1
Begin in Pigeon prep with your right leg forward.
Step 2
Bend your back knee (the left side in this case) and grab hold of your left foot with your left hand.
Step 3
Slide your foot into the crook of your left elbow. You can stop here or progress to the next step.
Step 4
Reach your right arm straight up toward the ceiling. Bend your elbow, drop your right hand behind your head
Step 5
Bring your hands to meet. Press the back of your head into your right arm.
Step 6
Try not to fall over onto the right side of your hip. Keep your chest pointing toward the front of your mat.
Step 7
Release your foot, slowly lower your leg with control, and repeat the pose with the left knee forward.

Benefits and Contraindications

Benefits

Stretches and rejuvenates the spine

Stretches the shoulders and quadriceps

Energizes the body and mind

Opens the hips and chest

Improves circulation to the pelvic region

Contraindications

Sacroiliac injury

Knee injury

Ankle injury

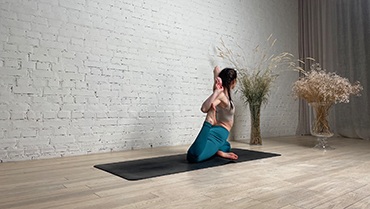
Photo poses in different angles

Modifications, Props and Tips

  • If you can’t yet rest your foot in the crease of your elbow, use a strap. Loop a yoga strap around your back foot and hold onto both ends of the strap with your top hand. Let your bottom hand rest on your front thigh.
  • If the full backbend is too intense for you, release your top hand back onto your lowered (front) thigh for support.
  • If your front-leg hip does not come all the way to the floor, place a folded blanket under your hip for extra support.
  • Keep your front shin as parallel to the front edge of your mat as possible. If your hips are tight, your front shin might angle back toward your opposite-leg hip. That is fine. With practice, the flexibility in your hips will increase.
Best Yoga Straps Reviewed and Rated
The Best Yoga Straps: Your Ultimate Buying Guide
/

You do not compulsorily need anything more than your body, breath, and a room spacious...

Best Cork Yoga Blocks
The Best Cork Yoga Blocks For Support And Flexibility
/

A yoga block crafted from cork material serves as a supportive prop in yoga practice....

best yoga blankets review
7 Best Yoga Blankets – Extra Grip And Gentle Support
/

The yoga blanket is an accessory every yogi needs. Whether you’re more experienced or just...

best yoga mat for you
The Best Yoga Mats For Your Practice
/

The art of yoga is a special one and those who enjoy practicing on their...


Iana Varshavska
Iana Varshavska
Website administrator

A digital marketer in love with yoga and everything that goes along with it. In 2021, her huge passion for yoga led her to yoga teacher trainings. After successfully completing her studies, Iana received her Yoga Alliance U.S. certification, left the corporate IT world and devoted herself to the development of Yanva. To be able to create the best online yoga space for yoga enthusiasts like her, Iana is constantly learning and improving her skills in various aspects of yoga philosophy, anatomy and biomechanics. Since 2021, she has continued to attend various types of teacher training, including yoga therapy, gives online and offline classes, and conducts local workshops for people who want to learn more about yoga. At the moment, Iana continues to work on her personal practice, improving her hand balancing skills, as well as developing her own training programs.